오늘 포스트는 이전 포스트에서 언급했던 Fragment에 대해서 간단한 예제를 만들어 보려고 합니다.
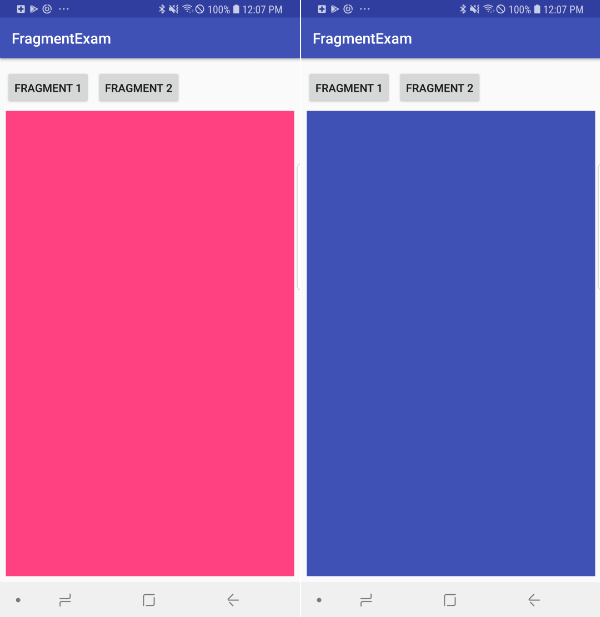
어떤 예제를 만들 것인가? 사실 너무 간단한 예제입니다.
2개의 Fragment를 만들고(분홍색, 파란색)
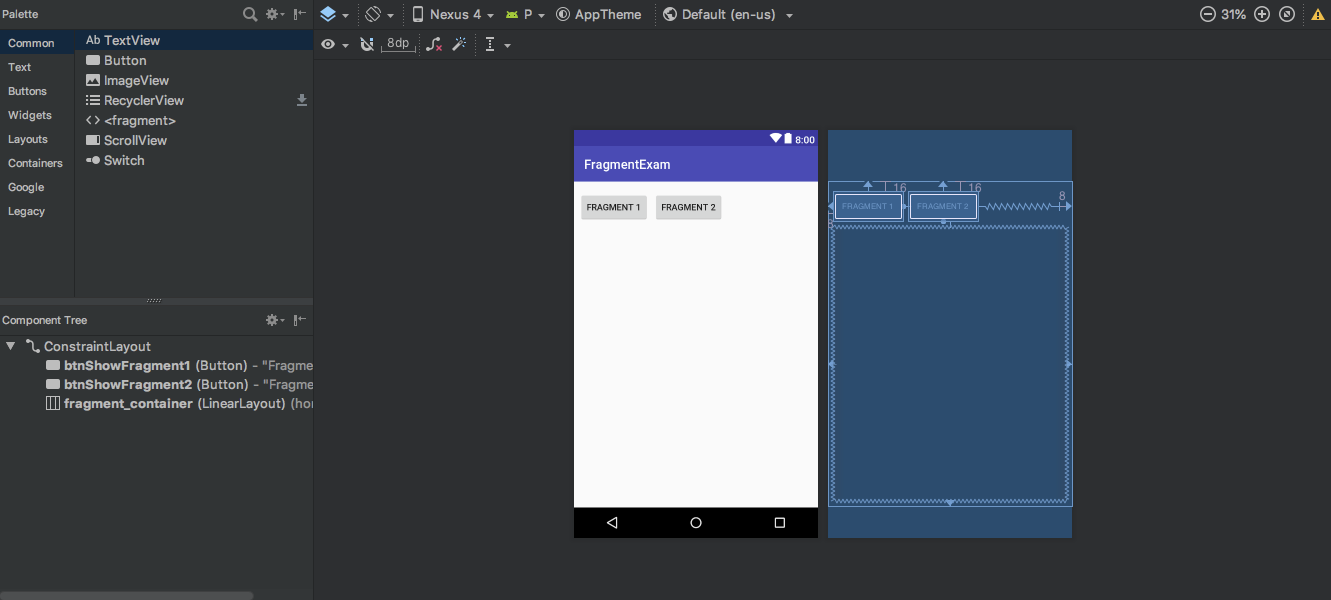
Main 아래와 같이 액티비티를 만들었습니다.
activity_main.xml activity_main.xml 1 2 3 4 5 6 7 8 9 10 11 12 13 14 15 16 17 18 19 20 21 22 23 24 25 26 27 28 29 30 31 32 33 34 35 36 37 38 39 40 41 42 43 44 <?xml version="1.0" encoding="utf-8"?> <android.support.constraint.ConstraintLayout xmlns:android ="http://schemas.android.com/apk/res/android" xmlns:app ="http://schemas.android.com/apk/res-auto" android:orientation ="horizontal" android:layout_width ="match_parent" android:layout_height ="match_parent" > <Button android:id ="@+id/btnShowFragment1" android:layout_width ="wrap_content" android:layout_height ="wrap_content" android:layout_marginStart ="8dp" android:layout_marginTop ="16dp" android:text ="Fragment 1" app:layout_constraintStart_toStartOf ="parent" app:layout_constraintTop_toTopOf ="parent" /> <Button android:id ="@+id/btnShowFragment2" android:layout_width ="wrap_content" android:layout_height ="wrap_content" android:layout_marginEnd ="8dp" android:layout_marginStart ="8dp" android:layout_marginTop ="16dp" android:text ="Fragment 2" app:layout_constraintEnd_toEndOf ="parent" app:layout_constraintHorizontal_bias ="0.0" app:layout_constraintStart_toEndOf ="@+id/btnShowFragment1" app:layout_constraintTop_toTopOf ="parent" /> <LinearLayout android:id ="@+id/fragment_container" android:layout_width ="0dp" android:layout_height ="0dp" android:layout_marginBottom ="8dp" android:layout_marginEnd ="8dp" android:layout_marginStart ="8dp" android:layout_marginTop ="8dp" android:orientation ="horizontal" app:layout_constraintBottom_toBottomOf ="parent" app:layout_constraintEnd_toEndOf ="parent" app:layout_constraintStart_toStartOf ="parent" app:layout_constraintTop_toBottomOf ="@+id/btnShowFragment2" /> </android.support.constraint.ConstraintLayout >
MainActivity.java MainActivity.java 1 2 3 4 5 6 7 8 9 10 11 12 13 14 15 16 17 18 19 20 21 22 23 24 25 26 27 28 29 30 31 32 33 34 35 36 37 38 39 40 41 42 43 44 45 package com.sawd.app.fragmentexam;import android.os.Bundle;import android.support.v4.app.FragmentManager;import android.support.v4.app.FragmentTransaction;import android.support.v7.app.AppCompatActivity;import android.view.View;import android.widget.Button;public class MainActivity extends AppCompatActivity @Override protected void onCreate (Bundle savedInstanceState) super .onCreate(savedInstanceState); setContentView(R.layout.activity_main); Button btnShowView1 = findViewById(R.id.btnShowFragment1); btnShowView1.setOnClickListener(new View.OnClickListener() { @Override public void onClick (View view) FragmentManager fragmentManager = getSupportFragmentManager(); FragmentTransaction fragmentTransaction = fragmentManager.beginTransaction(); fragmentTransaction.replace(R.id.fragment_container, new Fragment1()); fragmentTransaction.commit(); } }); Button btnShowView2 = findViewById(R.id.btnShowFragment2); btnShowView2.setOnClickListener(new View.OnClickListener() { @Override public void onClick (View view) FragmentManager fragmentManager = getSupportFragmentManager(); FragmentTransaction fragmentTransaction = fragmentManager.beginTransaction(); fragmentTransaction.replace(R.id.fragment_container, new Fragment2()); fragmentTransaction.commit(); } }); FragmentManager fragmentManager = getSupportFragmentManager(); FragmentTransaction fragmentTransaction = fragmentManager.beginTransaction(); fragmentTransaction.replace(R.id.fragment_container, new Fragment1()); fragmentTransaction.commit(); } }
Fragment는 FragmentManager를 이용해서 FragmentTransaction 인스턴스를 통해 사용 가능합니다.
get FragmentTransaction 1 2 FragmentManager fragmentManager = getSupportFragmentManager(); FragmentTransaction fragmentTransaction = fragmentManager.beginTransaction();
이 FragmentTransaction을 이용해 변경 사항을 설정하기 위해 add(), remove(), replace()와 같은 메서드를 이용할 수 있습니다.
replace method 1 2 public abstract FragmentTransaction replace (int containerViewId, Fragment fragment)
replace의 첫번째 인자는 Fragment를 나타낼 뷰, 두번째 인자는 해당 Fragment를 넘겨주면 됩니다.
how to call replace method 1 fragmentTransaction.replace(R.id.fragment_container, new Fragment1());
FragmentTransaction을 변경하고 나면 반드시 commit()을 호출해야 변경 내용이 적용됩니다.
1 fragmentTransaction.commit();
완성된 코드 뭉치는 이렇게 됩니다.
1 2 3 4 FragmentManager fragmentManager = getSupportFragmentManager(); FragmentTransaction fragmentTransaction = fragmentManager.beginTransaction(); fragmentTransaction.replace(R.id.fragment_container, new Fragment1()); fragmentTransaction.commit();
다시 MainActivity.java로 돌아와서 아래의 문구가 이해가 되실겁니다.
1 2 3 4 5 6 7 8 9 10 11 12 13 14 15 16 17 18 19 20 21 Button btnShowView1 = findViewById(R.id.btnShowFragment1); btnShowView1.setOnClickListener(new View.OnClickListener() { @Override public void onClick (View view) FragmentManager fragmentManager = getSupportFragmentManager(); FragmentTransaction fragmentTransaction = fragmentManager.beginTransaction(); fragmentTransaction.replace(R.id.fragment_container, new Fragment1()); fragmentTransaction.commit(); } }); Button btnShowView2 = findViewById(R.id.btnShowFragment2); btnShowView2.setOnClickListener(new View.OnClickListener() { @Override public void onClick (View view) FragmentManager fragmentManager = getSupportFragmentManager(); FragmentTransaction fragmentTransaction = fragmentManager.beginTransaction(); fragmentTransaction.replace(R.id.fragment_container, new Fragment2()); fragmentTransaction.commit(); } });
Fragment Fragment1.xml 크게 의미없는 배경만 있는 코드지만 혹시 필요로하는 분들을 위해 작성합니다.
fragment1.xml 1 2 3 4 5 6 7 8 <?xml version="1.0" encoding="utf-8"?> <android.support.constraint.ConstraintLayout android:id ="@+id/parentView" xmlns:android ="http://schemas.android.com/apk/res/android" android:layout_width ="match_parent" android:layout_height ="match_parent" android:background ="@color/colorAccent" > </android.support.constraint.ConstraintLayout >
Fragment1.java Fragment1.java 1 2 3 4 5 6 7 8 9 10 11 12 13 14 15 16 17 18 package com.sawd.app.fragmentexam;import android.os.Bundle;import android.support.v4.app.Fragment;import android.view.LayoutInflater;import android.view.View;import android.view.ViewGroup;public class Fragment1 extends Fragment @Override public View onCreateView (LayoutInflater inflater, ViewGroup container, Bundle savedInstanceState) View parentView = inflater.inflate(R.layout.fragment1, container, false ); return parentView; } }
Fragment2.xml Fragment1과 완전 같고 xml의 background만 다릅니다.
fragment2.xml 1 2 3 4 5 6 7 8 <?xml version="1.0" encoding="utf-8"?> <android.support.constraint.ConstraintLayout android:id ="@+id/parentView" xmlns:android ="http://schemas.android.com/apk/res/android" android:layout_width ="match_parent" android:layout_height ="match_parent" android:background ="@color/colorAccent" > </android.support.constraint.ConstraintLayout >
Fragment2.java Fragment2.java 1 2 3 4 5 6 7 8 9 10 11 12 13 14 15 16 17 18 package com.sawd.app.fragmentexam;import android.os.Bundle;import android.support.v4.app.Fragment;import android.view.LayoutInflater;import android.view.View;import android.view.ViewGroup;public class Fragment1 extends Fragment @Override public View onCreateView (LayoutInflater inflater, ViewGroup container, Bundle savedInstanceState) View parentView = inflater.inflate(R.layout.fragment1, container, false ); return parentView; } }
마무리 간단하게 Fragment를 사용하는 방법을 알아봤는데요.
Fragment-Example